How to print miniatures at home: The complete FDM guide
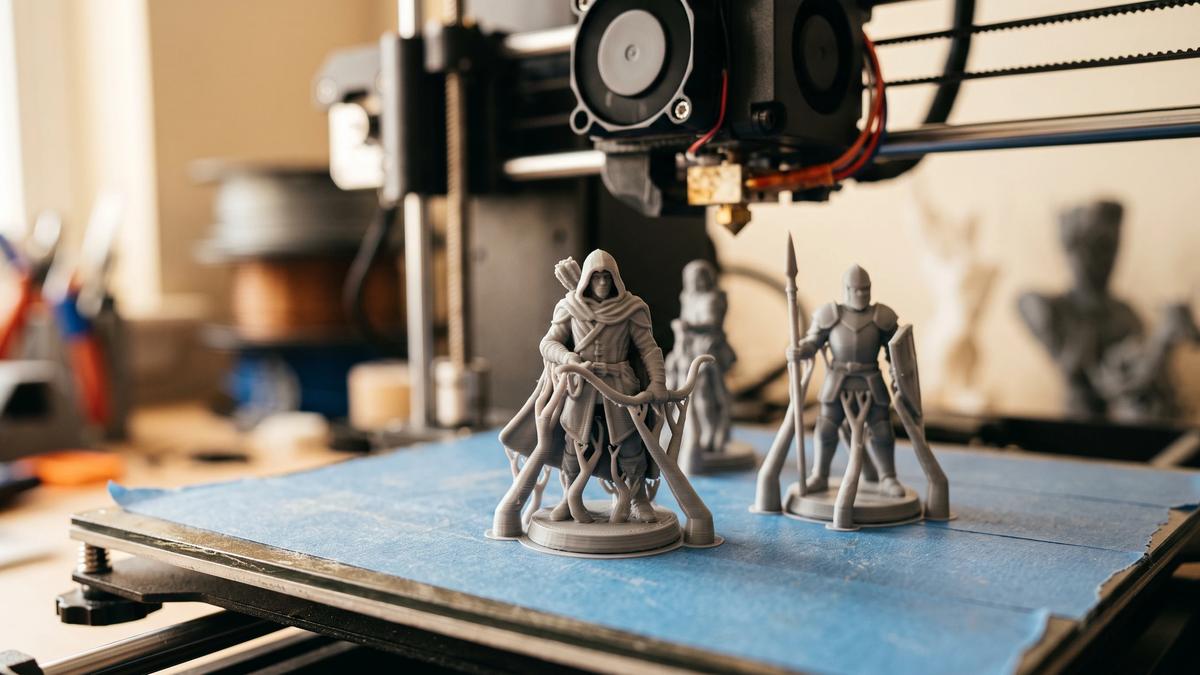
Resin printers get all the glory in the miniature world - but if what you own is an FDM printer, you don't have to sit this hobby out. With the right nozzle, settings, and a technique borrowed from resin printing, an FDM machine produces tabletop-quality miniatures that look great painted and on the table. This guide covers the exact setup: what to change, what to print, and how to finish the result so nobody asks which printer made it.
Can FDM really print good miniatures?
Honest answer first: for museum-grade display pieces with microscopic detail, resin still wins - that's physics, not opinion. But "tabletop quality" is a different bar. A miniature viewed from two feet away, painted and primed, needs clean silhouettes and sharp major details, not perfection under a magnifying glass. FDM clears that bar - if you stop printing miniatures the way you print everything else.
The core insight of this entire guide: print your miniatures like a resin printer would. Tilted orientation, tree supports, fine layer heights. The default FDM approach - model flat on the plate, standard 0.2mm layers, vertical supports - produces figures that look 3D-printed from across the room. The resin-style approach takes more setup and closes most of the gap.
(Deciding between buying an FDM or resin machine specifically for minis? That's a different question).
Step 1: The nozzle decision
The stock 0.4mm nozzle on most printers is built for speed and general-purpose parts. For character miniatures, a 0.2mm nozzle is the single biggest quality upgrade available - it's what lets armor plates, facial features, and sword edges come out crisp instead of soft.
The trade-off is time: expect print times to double or more. A practical split many miniature printers settle into: 0.2mm nozzle for character models and display pieces, 0.4mm for terrain, bases, and batch rank-and-file infantry where speed matters more than close-up detail.
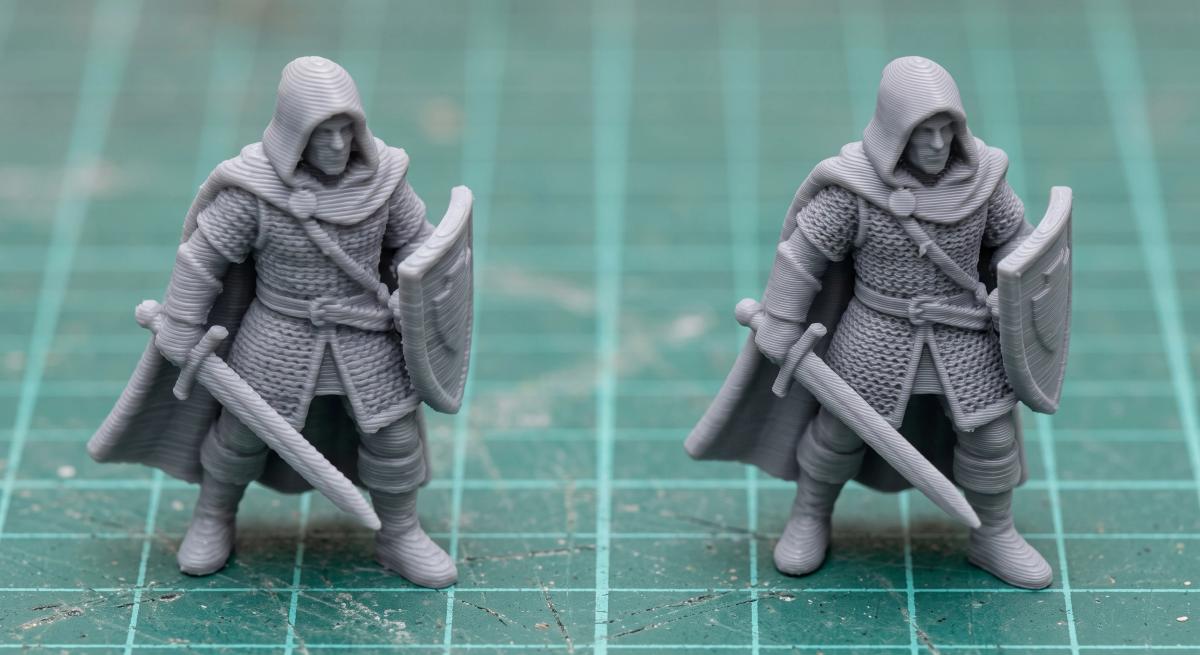
If swapping nozzles isn't in the cards, don't quit - a well-tuned 0.4mm setup at fine layer heights still produces respectable tabletop figures. The nozzle sharpens the result; the settings below do the heavy lifting.
Step 2: The settings that matter
Layer height is the most important setting for miniature quality. The consensus sweet spot for FDM minis is 0.08–0.12mm - fine enough that layer lines nearly vanish under primer and paint. A useful rule of thumb: keep layer height at 25–50% of your nozzle diameter.
Resist the urge to chase the absolute minimum. A clean 0.08mm print beats a failed 0.05mm print every time - reliability at a fine-but-achievable height wins over ambition at the ragged edge of what your machine can do.
Variable layer height is the best time-saver in the toolbox if your slicer supports it: fine layers (around 0.08mm) on detailed areas like faces and hands, thicker layers (around 0.16mm) on flat, featureless zones like bases and cape backs. Same visible quality, 20–30% less print time.
The rest of the profile:
- Material: ordinary PLA or PLA+ is the standard for minis - easy, cheap, and detail-friendly.
- Cooling: run the part cooling fan at 100% after the first layers; small models need aggressive cooling so each thin layer solidifies before the next lands.
- Speed: slow down for miniatures. Fine details need the printhead to move deliberately, not race.
- One warning: don't copy someone else's temperature, retraction, or flow values - those are machine-and-filament calibration settings, not miniature settings. Calibrate your printer for your filament first, then apply the miniature profile on top. Most "miniature settings don't work" complaints trace back to an uncalibrated machine.
Step 3: Orientation and supports - the resin trick
Here's where FDM miniature printing diverges hardest from default habits.
Tilt the model. Instead of standing the figure flat on the plate, angle it around 30–45 degrees. Tilting changes which surfaces face down, reduces the harsh overhangs that FDM struggles with, and shifts support contact points away from the most visible surfaces.
Use tree supports, not standard grid supports. Every major slicer has them now (PrusaSlicer calls them organic supports, and its implementation is widely considered among the gentlest on models). Tree supports touch the model in fewer places, snake around detail instead of burying it, and remove far more cleanly than classic vertical scaffolding.
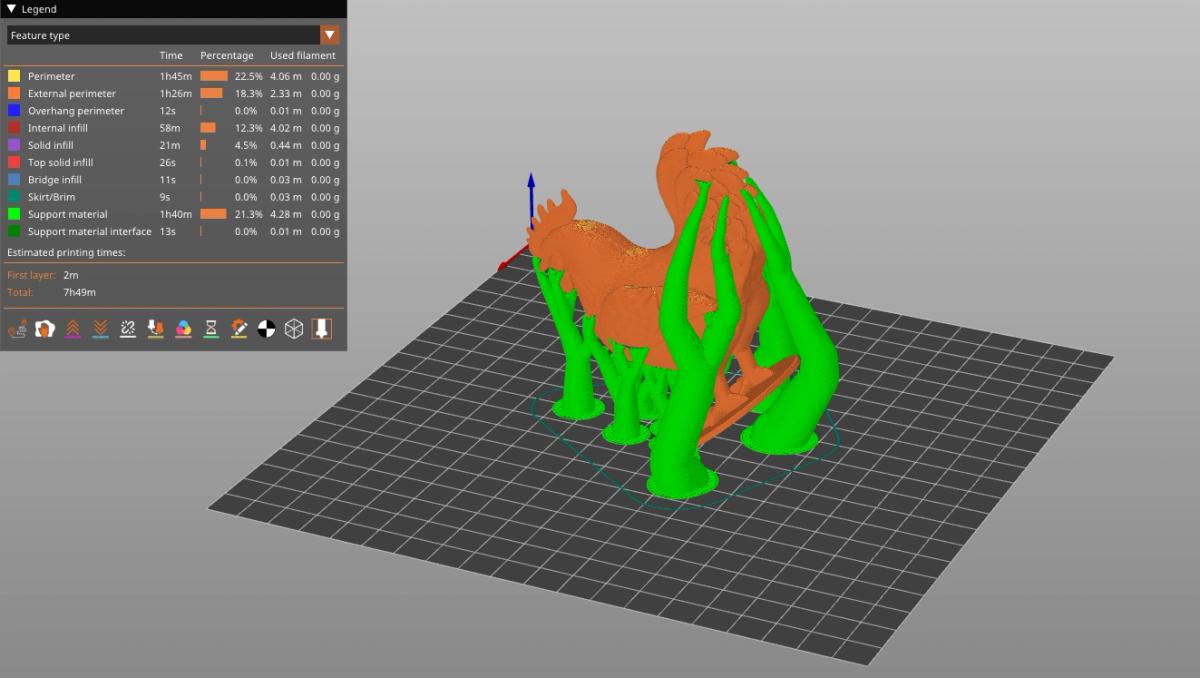
Turn on support interfaces. The interface layer between support and model is the difference between supports that peel away cleanly and supports that tear chunks out of your figure.
Use your slicer's preview before printing. Check where supports touch the model - if a tree lands on a face or an ornate shield, rotate the model until contact points move somewhere paint will hide. Some designers also publish pre-supported FDM versions of their minis; when available, they save real time. Files labeled "supported" on model marketplaces usually mean exactly this.
Step 4: Print several at once
A counterintuitive trick that improves quality: put two or three miniatures on the plate together. With a single small model, each thin layer prints so fast the previous one hasn't cooled - heat builds up and fine details slump. With multiple models, the head moves between them, giving every layer time to solidify. You get better figures and better plate efficiency.
Step 5: Post-processing - where FDM minis become convincing
The printed figure is the halfway point. Three finishing steps transform it:
Remove supports with flush cutters, not fingers. Clip supports away in small pieces rather than ripping them off in one satisfying pull - pulling is how spear tips, bayonets, and slender swords die. Patience here saves regluing later.
Sand strategically (optional). A quick pass with 400-grit sandpaper on flat, broad surfaces - shoulder pads, helmet tops, cape panels - knocks down visible layer lines. Stay away from faces and fine detail: sanding rounds off sculpted edges and can erase an entire texture in a few strokes.
Prime with filler primer. This is the cheap magic trick of FDM miniatures: automotive filler primer fills the micro-grooves between layers and creates a smooth painting surface. Spray from about 20cm in quick passes; at 0.08mm layer heights, one coat is usually enough. After priming, an FDM mini at arm's length reads remarkably close to resin.
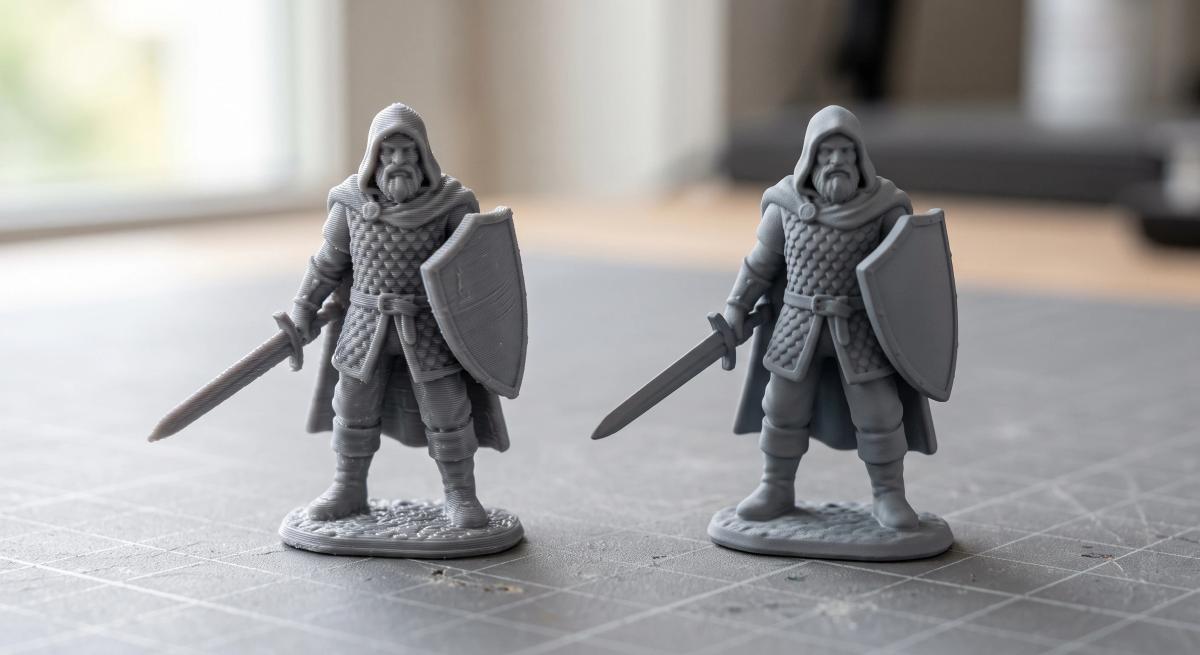
From there it's a painting project like any other - brushes, base coats, and patience.
Quick reference: FDM miniature starting profile
| Setting | Starting value |
|---|---|
| Nozzle | 0.2mm (characters) / 0.4mm (terrain, infantry) |
| Layer height | 0.08–0.12mm |
| Material | PLA / PLA+ |
| Cooling | 100% after first layers |
| Orientation | Tilted 30–45° |
| Supports | Tree/organic, interfaces on |
| On the plate | 2–3 models at once |
Treat these as starting ranges for a calibrated printer, not universal promises - print one standing figure, inspect, adjust one variable at a time.
Frequently asked questions
Can you print miniatures on an FDM printer?
Yes - tabletop-quality miniatures are absolutely achievable on FDM. The keys are a fine layer height (0.08–0.12mm), a tilted orientation with tree supports, and filler primer before painting. For microscopic display-grade detail, resin printers still hold the edge.What layer height is best for FDM miniatures?
The sweet spot is 0.08–0.12mm. Finer layers capture more detail but slow the print and increase failure risk; a reliable 0.08mm result beats a failed attempt at 0.05mm. Keep layer height between 25% and 50% of your nozzle diameter.Do I need a 0.2mm nozzle for miniatures?
Not strictly - but it's the biggest single quality upgrade for character models, sharpening details a 0.4mm nozzle renders soft. Expect print times to roughly double. Many makers use 0.2mm for heroes and display pieces, 0.4mm for terrain and batch infantry.What is the best filament for miniatures?
Ordinary PLA or PLA+ is the standard choice: it prints fine detail well, needs no enclosure, and takes primer and paint nicely. Exotic filaments add difficulty without adding visible quality on a painted tabletop figure.How do I stop supports from damaging my miniatures?
Use tree supports with support interfaces enabled, and check the slicer preview so contact points avoid faces and fine detail. When removing them, clip with flush cutters in small pieces instead of pulling - pulling is the leading cause of snapped weapons.How big should I print my miniatures?
Match your existing collection's scale - typically 28mm or 32mm for RPGs and wargames. Since scale labels vary between designers, measure against a miniature you own. [How to scale STL files for tabletop → /blog/how-to-scale-stl-files-tabletop/]
About the author
Written by
Ryan CarterI’m a 3D printing and miniature painting specialist with a background in digital modeling and tabletop gaming. I focus on 3D-printed miniatures, resin and FDM printing, model preparation, supports, priming, painting, and finishing techniques. I enjoy experimenting with different workflows and helping makers turn digital models into detailed, tabletop-ready miniatures.